How to Blur Faces and Objects in DaVinci Resolve
In some editing or color grading sessions, you might be asked to blur certain faces or objects.
You don’t need to switch to other programmes like Adobe After Effects to do this.
In this article I’m going to explain how to obscure faces and objects in the space of a few minutes using DaVinci Resolve.
Let’s take as an example a clip from a project that I coloured for Smirnoff.
1. Color Page
First of all, we should navigate to the Color Page
2. Choose a Window
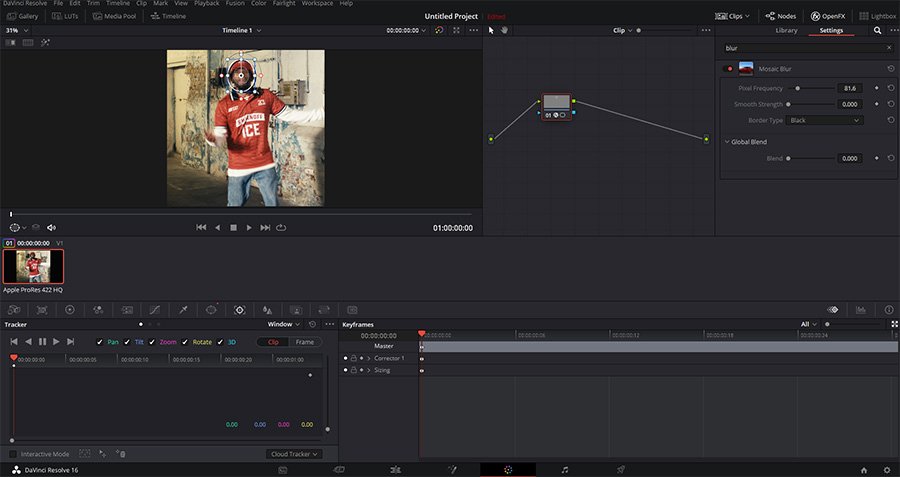
Go to the window section and choose the most suitable type of window.
If we’re obscuring a face then the circular window will be the most suitable; if it’s an object, then it really depends on the shape of the object.
Therefore, in this case we’re going to select a circular window.
Once we’ve selected our window, we can position it and redimension it according to the face or object that we want to blur.
We can find all the controls for transforming/redimensioning the window in the “transform” section.
3. Blur
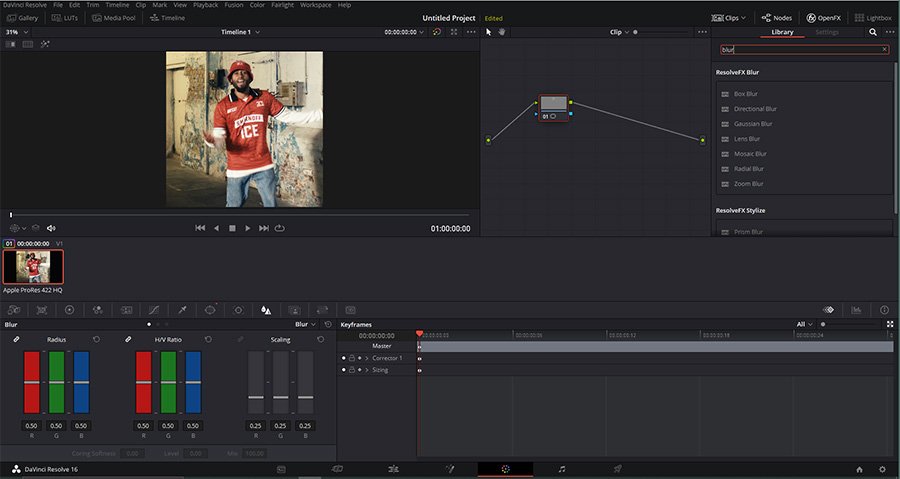
At this point, we will find ourselves basically faced with two options: using the standard blur function or choosing a different blur from the OpenFX section.
Let’s go through these in order...
Standard BLUR: By modifying the “radius” parameter, we can define the amount of blur that we wish to apply to the face.
OpenFX Blur: In the OpenFX section, we can find other kinds of blur, such as the mosaic blur, for example.
To do so, all you need to do is click on “OpenFX” in the top right hand corner and search for “blur”. You’ll find a list of different types of blur that you can choose from.
In this case, I will use a mosaic blur. Let’s select it then, and drag it onto the same node where we’d previously placed the mask. By modifying the parameters of the effect, such as for example the pixel frequency, you can personalise the type of blur that you wish to apply.
4. Tracking
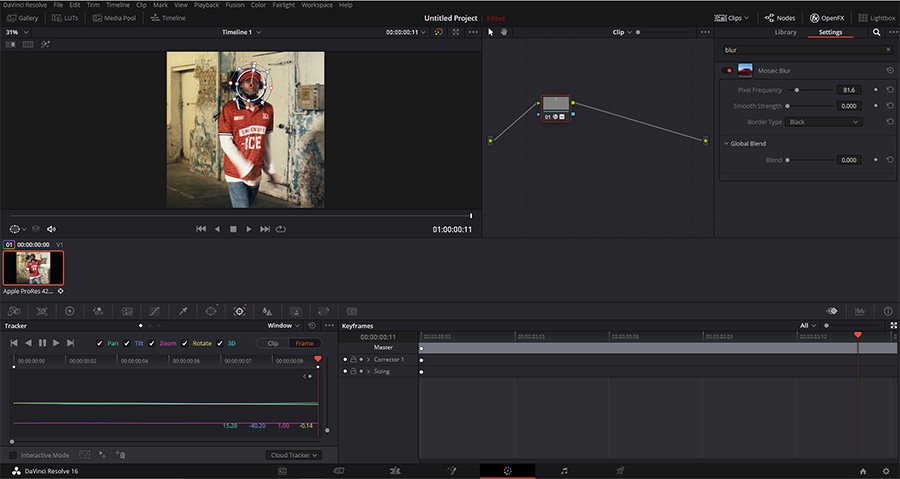
If the face or object in question moves, you’ll need to track the mask.
To do so, you just need to go to the “tracker” section, make sure that you’re at the start of the clip and then click on track forward.
Done!
Now you just need to get to work! ;)
Did you find this article helpful? Buy me a virtual coffee!
Sign up to my Newsletter to get your Free Colorist Pack!
You'll also receive updates on upcoming Products, Giveaways, Exclusive Content and more!


